Mounting and Framing a Large Print - january 2011
this is probably not such a big deal, but I never did this before, so I thought I would lay out the steps.

the key to this process is the aluminum support panel shown here. the print is going to be mounted on this using a heat sensitive archival adhesive called "Beva". the frame is standing on the floor to the left.

this is the untrimmed print on the panel in the frame. trimming the print with a razor so that it fit correctly on the panel proved to be the most difficult task, with many retrimmings, one cut thumb, and two drops of blood on the print.

this is Beva. it comes in a roll, with a release paper liner.

this is the Beva with the release paper removed. I rolled it smooth on the panel attempting to eliminate all bubbles.

ok, I've ironed the Beva down onto the aluminum, that went fine, I trimmed it, and now I am trying to iron the print down onto the Beva, but it is not sticking. what's wrong? do I need more heat ????

no, and I won't make this mistake again, I need to remove the second release liner on the Beva, a mylar sheet on the upside of the Beva once ironed down onto the aluminum. boy, do I feel stupid. Now, just heat the iron to 150 degrees fahrenheit. There is no degree mark on the iron of course.... just use trial and error !

is it better to feel stupid or scared? this is the critical time, applying heat to my precious print, with this release paper for protection, praying there's not too much heat, praying there is no stray dirt to put a scratch in the surface, praying there are no bubbles, and praying that everything sticks. (also praying I don't put an iron burn into the print taking this picture :-)) )
I don't see any bubbles, do you? It is laying perfectly flat. I did find a few spots on the edges where there was a little curl up, and I ironed those down again. (one week later, I can say "not so fast". I have spent the week ironing down various bubbles that appeared after a few days. I would say that this is a question of uneven heating originally. They seem to disappear if I apply heat for ten seconds...pressure is not needed, fortunately)
bubbles update 110530: well, the bubbles reappeared assertively over the winter, and I have just completed an attempt at a fix. I removed the print from the panel by applying heat, pulling, and detaching with a putty knife. Then I mounted a canvas on the panel using Beva, then I remounted the print on the canvas using another layer of Beva. After two days, no bubbles, and I am hopeful.)
bubbles update 110530: well, the bubbles reappeared assertively over the winter, and I have just completed an attempt at a fix. I removed the print from the panel by applying heat, pulling, and detaching with a putty knife. Then I mounted a canvas on the panel using Beva, then I remounted the print on the canvas using another layer of Beva. After two days, no bubbles, and I am hopeful.)

ok, into the frame, there is a strainer on the reverse side.

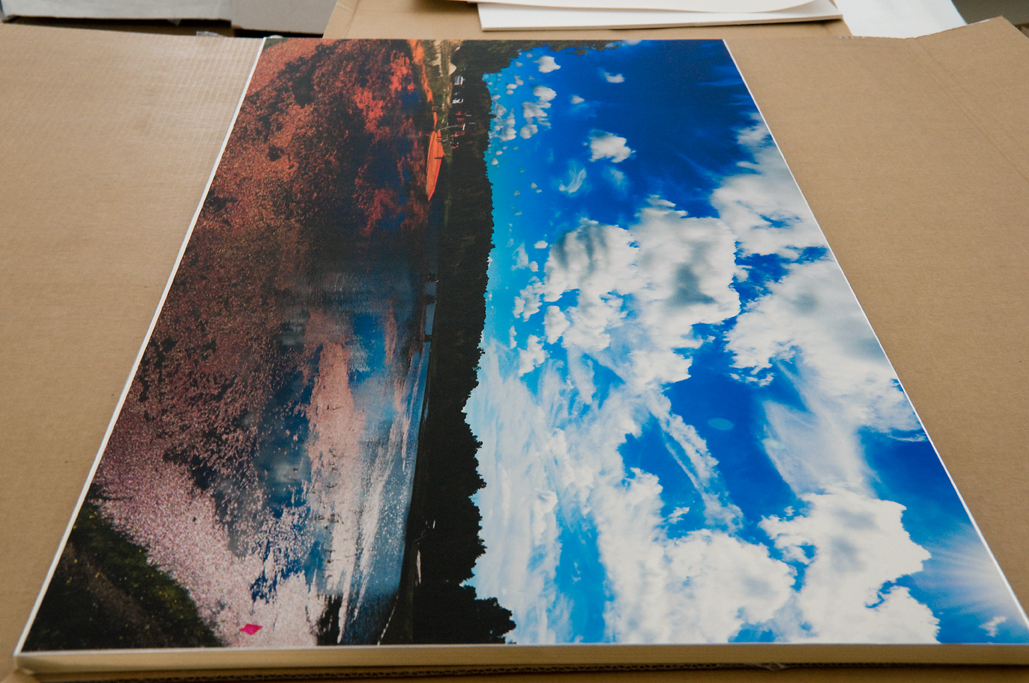
I like it. It doesn't look so big in this picture, but it is four feet long, and perhaps you can see that it is longer than anything else on this wall of the studio.
Thanks, feel free to contact me if there's anything here I can help with.
Mounting and Framing a Large Print - december 2010

This is a picture of some work in my studio. the reason it is here is that I am in the process of making and framing the biggest print I have ever made, two feet by four feet. It is the cranberry bog panorama shown in the middle, and I talked about this at the Cataumet Artists Circle last Saturday night. An image file of this is on the blog under the tab "harvest".
This print has been made on Hahnemuehle photo rag paper on an Epson 7600. It has been soaked in acrylic varnish and is now a composite of paper and acrylic. I am planning to put it in a cherry frame that will be of the same molding design as the light maple frame shown below it with the picture of the nun walking in Florence.
I have ordered the frame and an aluminum panel to mount it on. I am experimenting with archival mounting adhesives, and right now my two top candidates are Gudy O or V and Beva 371. If anyone has any good experience with these or has a good idea please email me at rmanzpho@cape.com.
I have lots of experience mounting acrylic-varnished prints on stretched canvas and canvas board, but I decided not to use this approach for this large print. I am worried about sag in stretched canvas, but more fundamentally that water-based acrylic "glue" I use on the canvas will warp the four-foot print.
The panel should arrive in January, and, if I succeed :)), I will put up a picture of the final result.
The panel should arrive in January, and, if I succeed :)), I will put up a picture of the final result.
My Studio, All Welcome - may 2010

if the flag is out, I am in or nearby. stop in or give me a call on my cellphone.
Me in My Studio - september 2009
 |
| photograph by Colby Fish |
and a few boxes of calendars :-)
My New Studio - march 2008
In January 2008 I decided to buy a studio space in the town of Bourne on Cape Cod. It is off MacArthur Boulevard (Route 28) near the village of Pocasset.
This is a pretty big step, as my studio has been our condo. But the condo has sort of filled up with frames and mat board and foam core and pictures. The computer and printers are in our bedroom, and my stepdaughter's bedroom fills up with prints just varnished.
The real reason I bought the space is that when I saw it, it spoke to me. I just knew this would make a good studio. It has big picture windows with a north view, a good front space for an office/reception and a huge back space for work tables. One corner in the back space, near the pair of windows, should make a good corner for doing portraits.
Around both rooms there is plenty of wall space to put up pictures for a gallery.
Around both rooms there is plenty of wall space to put up pictures for a gallery.
The location on Route 28 pretty much means that anyone from Bourne to Woods Hole to Martha's Vineyard drives past. And, for the time being, that is the community I hope to serve.
Buzzards Bay, the Canal, Gray Gables, Mashpee, Back River, Monument Beach, Tobey Island, Monk's Cove, Pocasset, Hen Cove, Patuisset, Cataumet, Squeteague, Megansett, Old Silver, Chapoquoit, Black Beach, Sippewissett, Wood Neck, Quissett, Woods Hole, Naushon, Robinson's Hole, Pasque, Quicks' Hole, Nashawena, Cuttyhunk, Menemsha. I have been up and down the Buzzards Bay east shore since before I can remember and gone a bit beyond to the Vineyard -- I hope to do more.
And I hope that my sign on the road will reach out to anyone with some part of their live in these places along the Bay shore, and you will stop in and see what I have to share.
Here are some pictures of the of the studio before I move in.
And I hope that my sign on the road will reach out to anyone with some part of their live in these places along the Bay shore, and you will stop in and see what I have to share.
Here are some pictures of the of the studio before I move in.


